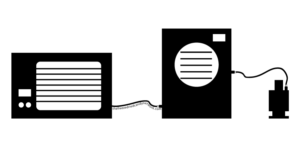
Here is a rundown on how to use your freeze dryer as a cold trap.
I’m one of the lucky ones that lives in a hot humid environment. Even better yet, I’m at sea level. Are you like me? Do you have problems with your vacuum pump when running candy in the vacuum oven?
You know, you set your oven to 135* wait at least an hour, maybe 2 just for good measure, then painstakingly load every tray full of product, close the valves and the door then hit the switch on the pump. You stand there hoping the oil doesn’t turn to milk, but it does.
Through reading and research, you’ve determined that you need a cold trap.
What is the purpose of a
cold trap?
Cold traps in this application stop water vapor in the candy from going into the vacuum pump. This decreases the need for additional oil changes and extends the life of the vacuum pump.
Well, that will be $200 bucks please
So you’ve got your cold trap and your extra hose, now all you need is some liquid nitrogen or dry ice. No biggie, you say to yourself as you hop in the truck to go grab some dry ice in the nearest little big town 20 miles away.
You make it back home, bust up your dry ice and add the isopropyl alcohol to create a nice slurry that will be the engine of your cold trap. Now the timer starts. Not the oven timer, silly, you have to restart the process to heat the oven all over again! Unless you left it running while you were out. The clock starts ticking on the dry ice slurry. Better work quick, cause it melts fast.
No, no more
I know this struggle and it just happened to be during a dry ice shortage in my area. One day, I stood there looking at the cold trap, and as cool as the thing is, all stainless steel, acrylic and siliconed to the max – it was useless without the dry ice.
I stared at it. I stared at it for a long time and thought: What if I turned it on its side? I wonder if I could maybe put some tiny heated trays in it like my freeze dryer has? And then I looked at the freeze dryer, noticing one line in and one line out. What was cooling the freeze dryer? Yeah, not dry ice, but a compressor.
I noticed the fittings and the cheap valve that comes standard on the drain side of the freeze dryer. I looked back at the hoses on the high and low sides of the cold trap.
This is a great idea
The engineering started to add up at the speed of light and hit me
all at once. I knew it would work almost immediately.
I could just get some fittings and an extra-long refrigerant hose, nix the bargain
basement Amazon vacuum pump, the beautiful cold trap and just hook the
vacuum oven straight up to the drain valve on the Freeze Dryer! YES!
I could even use my Harvest Right premier pump to draw a vacuum on both
machines at once. This is going to rock!, I though to myself.
But not without a speed bump
One, no, make that two 24 mile round trips later to the nearest hardware store that was open on a Sunday, and about $50 later, I had the fittings for the new valve assembly – the umbilical cord that would finally make the vacuum oven and the freeze dryer one cohesive family unit.
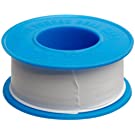
I got everything hooked up and made sure to use teflon tape on
the joints of the brass pipe fittings paying special attention to which
fittings were FLR and which were MIP.
So, here we go
It was time for a vacuum test. First step was to flip on the freeze dryer and head to the FTM menu.
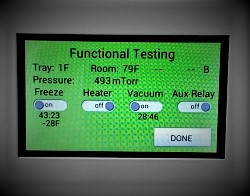
Here I had to be sure to toggle on the “freeze function”, essentially turning the freeze dryer’s chamber into a cold trap. Give it at least 10 minutes to chill. The temp will fall quickly without the “heater function” on. DO NOT SKIP THIS STEP!
I opened and closed the valve system where needed, double checked my doors and toggled the pump switch to the “on” position.
The vacuum test worked flawlessly without a single vacuum leak to be heard.
Even though it did take noticeably more time for the mTorr reading to do the limbo, it eventually got down to a range that I was happy with on both the digital display and the analog vo gauge.
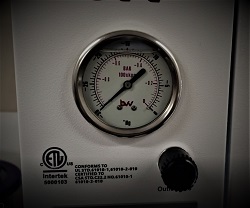
Well, I didn’t lose a hand
It was time to test out a handful of candy in the vacuum oven, so I did just that with great results. Granted, at the time of writing, I was new to the vacuum oven and I’m still learning its intricacies – it actually worked perfectly to vacuum-dry a handful of candy.
I was pleasantly surprised. Experiments don’t always go this smoothly for tinkerers without advanced degrees in STEM. No more 40 mile dry ice runs or the prospect of losing a hand like the T-1000 to some upset liquid nitrogen.
To My Delight
I had created a process for using the Harvest Right freeze dryer as a cold trap for my BVV 1.9 Neo vacuum oven. The cherry on top? This method will allow you to run a load of candy in each machine simultaneously off of one high-quality pump.
Try this yourself
DISCLAIMER:
This is an advanced technique that can RUIN your equipment if you do not have a firm grasp on what it is you are doing. Please take the time to understand the mechanics and the science involved with this DIY project. As stated in the disclaimer, I will not be held responsible for any outcome you, anyone else or your/their equipment/possessions experience as a result of reading and acting upon this write-up.
This write-up is for informational, educational and entertainment purposes only.
Tools You'll Need
- Adjustable Wrench
- Adjustable Pliers
- PTFE Tape
This is a very simple project if you have the right tools.

Bill Of Materials
These are common parts that can be found at a home improvement big box store.
For extra convenience, have them delivered from Amazon (affiliate links to follow) by clicking below.
Disclaimer: As an Amazon Associate, I earn from qualifying purchases. To read the full disclaimer click here.
#ad
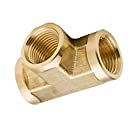
3/8" FIP Brass Pipe T
This is a 3 way female FIP fitting
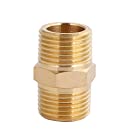
3/8" MIP Pipe Nipple (X2)
Use MIP fitting - length = your preference
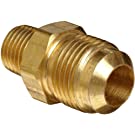
1/4" FLR x 1/4" MIP Half Union
This is an FLR to MIP fitting
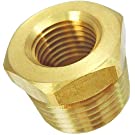
3/8" MIP x 1/4" FIP adapter
This is an MIP to FIP
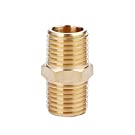
1/4" fLR Union (optional)
FLR fitting to extend hoses
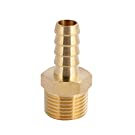
3/8" Hose Barb (optional)
3/8" ID x 3/8" MIP
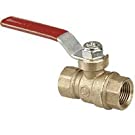
3/8" NPT ball valve
Female NPT to Female NPT - Make sure it's rated for GAS
Don't forget the PTFE!
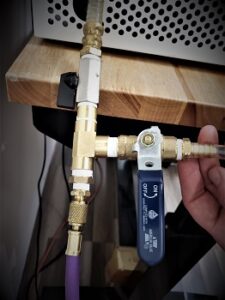
I won’t go into how to prep and assemble brass fittings. (Youtube search how to assemble brass pipe fittings if you need a refresher).
Assemble the fittings as shown. This would be a good time to replace that cheap HR valve if it needs it.
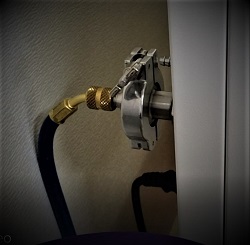
Connect the vacuum hose to your new fittings on the freeze dryer and the KF-25 fitting on the back of the vacuum oven. I used a straight hose barb for a better angle on the existing drain tube.
That’s really all that there is to it. As stated above, check all your seals and your FLR fittings, close your valves, turn on your freeze dryer-turned-cold trap and run a vacuum test. Listen for hissing. Watch your mTorr fall till it can’t go any more. You should be good to go.
Drop me a line in the Facebook groups and let me know if you have questions.
© 2023 | The Freeze Dried Candy Network. All Rights Reserved.

